
AetherSX2 texture pack– Download, Replacement and Not working Fix Guide


what is hd texture pack in aethersx2
On modern phone screens, classic PS2 games often appear blurry, pixelated, or low in detail due to their original low-resolution textures. The AetherSX2 texture replacement feature allows players to replace these original textures with higher-resolution or custom images, improving the visual quality. With this feature, you can make characters, environments, and objects look sharper, more detailed, and closer to modern graphics standards, while also having the flexibility to apply custom designs or mods to personalize your gaming experience.
How to Enable Texture Replacement in AetherSX2
There are multiple ways to enable texture replacement in Aethersx2. You can apply this dynamically for all games and also can set it to specific game.
Global Settings (Applies to All Games)
- Open the AetherSX2 emulator
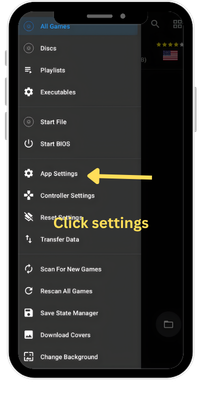
- Tap the three-line menu (top left)
- Go to Settings and find the Graphics
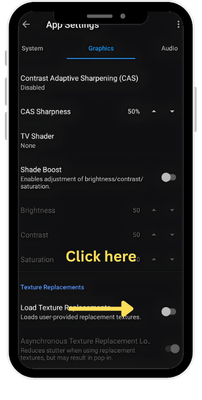
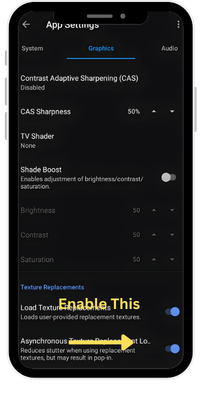
- At the bottom Tap Texture Replacements
You will see two main options:
Per-Game Settings (Recommended)
Per-game settings are better because they only apply to one game. This means you can have texture replacement on for one game and off for another.
- In the game library, long-press on a game
- Tap Properties
- Go to Graphics
- Find Texture Replacements
- Set your toggles as described above
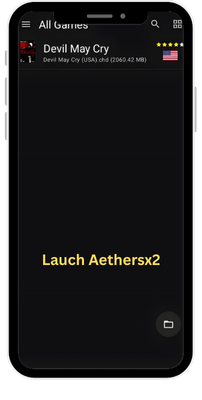
How to Install HD Texture Packs
- Downlead the file by clicking the above placed button
- Find your desired game
- Download and Extract texture packs from .zip or .7z file.
- After extracting, you should see a folder named after the game ID (like SLUS-21621) or a folder called replacements.
- Make sure Load Texture Replacements is turned ON in your game’s Graphics settings
- If everything is correct, you’ll see a small notice in the top-left corner of the screen, indicating textures are being loaded.
How to Create you own Texture pack
If you don’t find any pre-built texture pack for your game? No problem. You can create your own. Here’s the full process.
- Go to your game’s Properties → Graphics → Texture Replacements → Dump Textures and turn it ON.
- Launch the game and play normally — open doors, move through areas, trigger cutscenes.
- The more of the game you explore, the more textures will be captured.
- Play for at least 5–10 minutes per area. The textures will appear automatically in:
- Android/data/xyz.aethersx2.android/files/textures/[GAME_ID]/dumps/
Troubleshooting
Cover art failing to appear is one of the most common AetherSX2 complaints. Here are every root cause and its fix:
Textures Are Not Showing
This issue is commonly due to “Load Texture Replacements” not enabled, or the emulator is not checking the right folder.
- Go to game Properties → Graphics → Texture Replacements
- Make sure Load Texture Replacements is toggled ON
- Restart the game completely (don’t just resume)
- Check that your files are in replacements/ not directly in the game ID folder
Wrong Folder Path
Another common mistake is pacing in the wrong directory. To resolve this Double-check every part of the path:
- Putting files in textures/[GAME_ID]/ instead of textures/[GAME_ID]/replacements/
- Using the wrong game ID (e.g., using a PAL ID for an NTSC game)
- Placing a nested folder inside replacements instead of files directly in it
Performance Drop After Installing Textures
HD texture packs can be hundreds of megabytes or even several gigabytes. Loading them in real-time is GPU and RAM intensive.
- Enable Async Texture Loading — this reduces frame drops by loading textures in the background
- Use DXT5 DDS format instead of PNG — compressed DDS files load much faster
- Install only the textures you care about (main character, key environments) rather than the full pack
- If your device has enough RAM (6GB+), enable Precache Textures to pre-load everything at startup